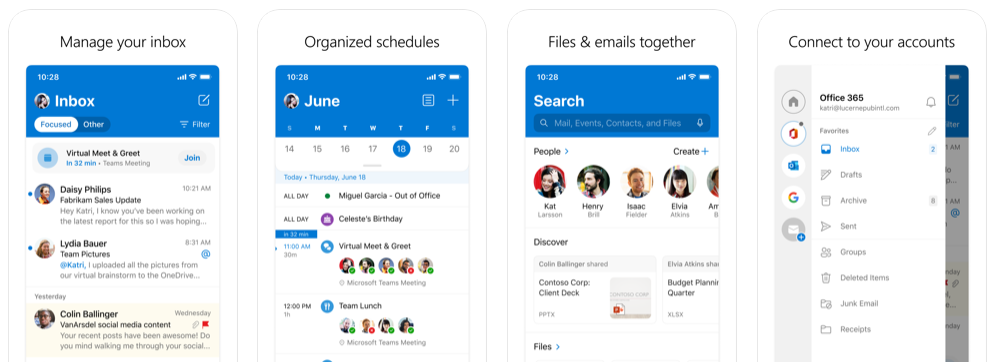
“We want everyone to be able to achieve more with less. The tips and tricks here are small but powerful steps to make Outlook for iOS work better for you.”
Here’s a few productivity features in Outlook for iOS we think you’ll find useful. We use Outlook on iOS as well as Android. This article is specific to Outlook on iOS.
We have other articles which expand and complement this article.
Swipe Left and Swipe Right are Customizable
In Outlook on iOS, you can modify the action that occurs when you swipe left and swipe right. There is a list of available choices, so it must be one of these:
-
Delete
-
Archive
-
Flag / Unflag
-
Mark Read / Unread
-
Move
-
Snooze
-
Read & Archive
-
None (in case you want to turn off any actions)
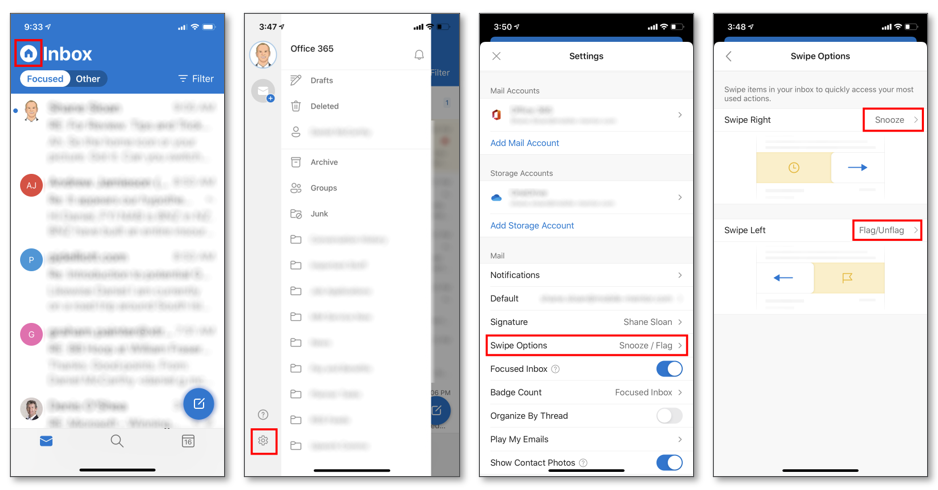
To set your swipes the way you want, tap on your picture or home icon then tap on the settings icon in the bottom left. Next find and tap on Swipe Options. Finally, select the desired action for Swipe Left and Swipe Right respectively.
Note that you can set both ways to the same action if you like, but it seems like a waste.
Selecting Multiple Emails at Once
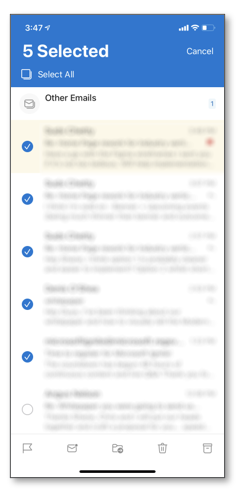
To select multiple emails press and hold on an email for about a full second. This will change Outlook for iOS to a selection view where you can tap on multiple emails. After you’ve selected all the emails you want you can do one of the following actions from the menu at the bottom of the screen
-
Flag
-
Mark as unread / read
-
Move to folder
-
Delete
-
Archive

Change Which App Is Opened for Navigation (Maps)
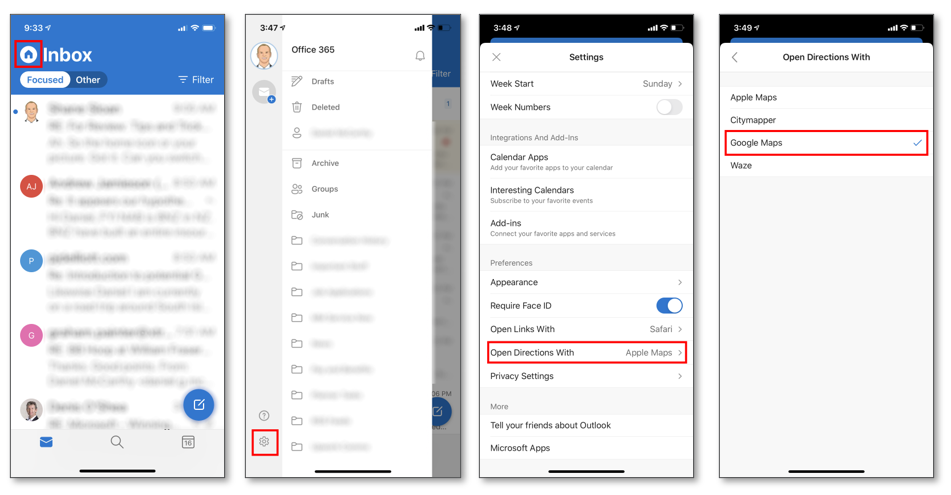
If you prefer to use another navigation app rather than the native app, you can change that setting in Outlook for iOS. You’ll need to have the 3rd party navigation app installed on the device prior to selecting it in Outlook. Google Maps and Waze are popular examples of alternatives.
To change your default navigation app, tap on your picture or home icon then tap on the settings icon in the bottom left. Next scroll down and tap on Open Directions With. Finally, select the desired navigation app of your choice.
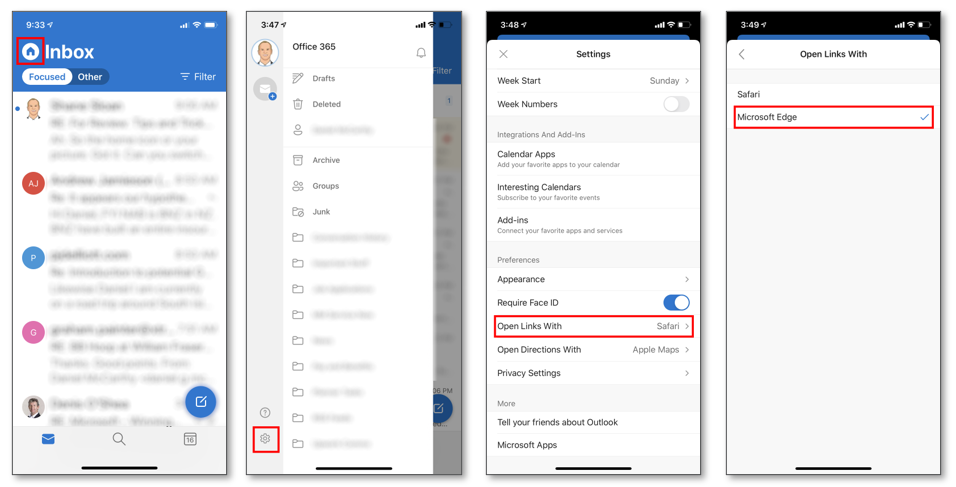
Change Which Browser is Opened for Links
Outlook for iOS allows you to switch the default browser for all links. As a note, if your Outlook is under management by your company, they will need to authorize a 3rd party browser in your Work Profile – this must be done by an IT admin.
To change your default browser for links, tap on your picture or home icon then tap on the settings icon in the bottom left. Next scroll down and tap on Open Links With. Finally, select the desired navigation app of your choice.
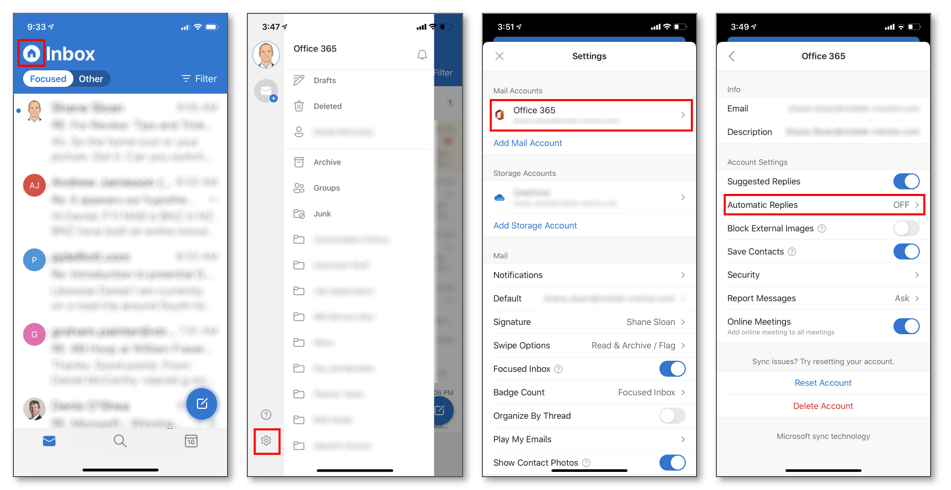
Turn on Automatic Replies
Sometimes you may be out of range while on the go and you want to let everyone know you’ll get back to them. You can set automatic replies from Outlook on iOS
To set automatic replies, tap on your picture or home icon then tap on the settings icon in the bottom left. Next tap on Your Mail Account (it’s right at the top). Next, tap on Automatic Replies, Swipe On, and configure the reply to meet your needs.
NOTE: Outlook for iOS does not allow for automatic replies to be on for a pre-defined time window. You must go back in and turn this feature off yourself. This may change in future releases of Outlook for iOS.
Add Birthdays, Holidays, and Team Calendars
Outlook allows you to add other Microsoft Exchange calendars to Outlook on iOS. Note that you can also add third party calendars, check the next section for instructions.
To add birthday, holiday, or team calendars to Outlook on iOS first tap on the Calendar icon from the home screen. Next, tap on your picture or home icon. Finally, tap on the calendars you would like to include.

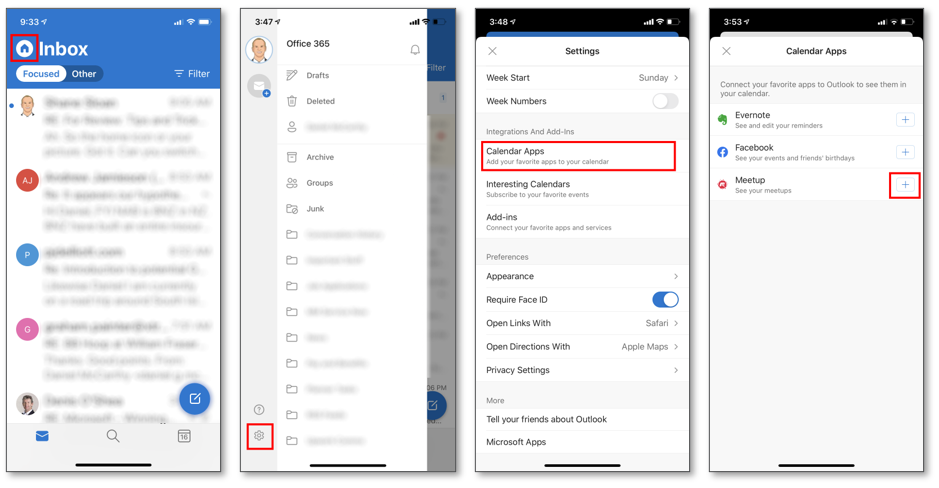
Add 3rd Party Calendar Apps
You can add your external calendars to Outlook on iOS. These might be personal calendars or ones from another business or organization. If you are looking to add birthdays, holidays, or team calendars, check the previous section.
To set up an additional calendar, tap on your picture or home icon then tap on the settings icon in the bottom left. Next, scroll down and tap on Calendar Apps. Finally, add the 3rd party calendars you desire.
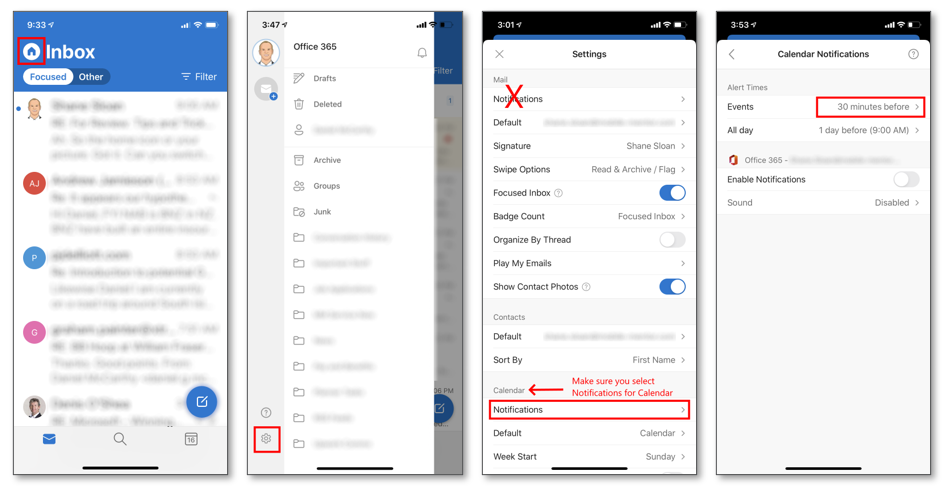
Change your Default Calendar Notification Reminder for New Meetings and Appointments
This one is a personal favourite. I prefer a 30-minute reminder as a default. If you prefer something other than 15 minutes, this is a life saver.
To change your default reminder, tap on your picture or home icon then tap on the settings icon in the bottom left. Next, scroll down and tap on Notifications under the Calendar section of the menu. Finally, tap on Events and set it accordingly.
Require Face ID
If you are interested in a bit of extra security, you can turn on Face ID in Outlook for iOS. When you open the app, it will automatically verify you before allowing further access. This feature can be annoying if you are wearing a face mask though as Face ID doesn’t play well with masks.
To require Face ID, tap on your picture or home icon then tap on the settings icon in the bottom left. Next, scroll down and turn on Require Face ID.

Conclusion
This isn’t an exhaustive list of features available in Outlook for iOS. If you think the app should have a feature, go exploring in the settings menu and you might find it. Or go hit the search engines up and see what you find. I’ve intentionally left out common features as you probably know about them, and if not, they are exhaustively covered on the internet already.
We want everyone to be able to achieve more with less. The tips and tricks here are small but powerful steps to make Outlook for iOS work better for you. Hopefully, they will save you time and let you achieve more.
If you’re interested in learning how to manage iOS devices, check out our list of services or contact us. If you’re interested in knowing how your employees can use their own iOS devices for work at your company check out our BYOD 365 service.