Many companies have branded templates. However, I’ve often found that companies fail to make use of all the available features in Microsoft Word. Here is an overview of some of the features that often get overlooked.
Use the Design Tab to set Colours and Fonts
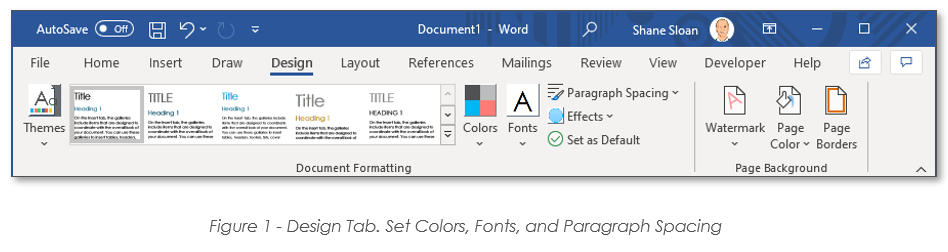
When creating a Word template for your company, don’t overlook the Design tab. From there you can set (fig. 1):
-
preferred font(s)
-
colours to a custom palette which matches your branding
-
paragraph spacing
The advantage of the Design tab is that the font, colour, and paragraph spacing settings get applied to all styles at once. It saves you from needing to individually set the font in every saved style.
Colouring is important as there is no eyedropper in Microsoft Word. If you don’t set up the colour palette with your company’s branded palette, then employees will have a difficult time using on-brand colours in their documents.
Document Properties Save Time and Prevent Typos
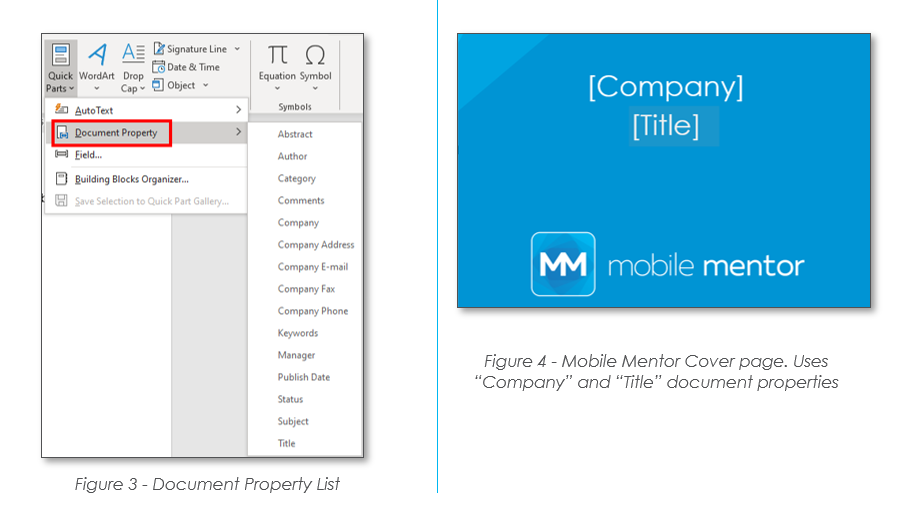
Under the Insert tab on the right there is a section named “Text.” Here you will find a “Quick Parts” button (fig. 2), and in there is an option called “Document Property List” (fig. 3).
When you expand the list, you will see there are many available document properties to choose from.
The advantage of using these document properties is that when you fill in one instance of the property, the rest of the instances receive the same information. For example, let’s say you wanted the document title to be on the cover page as well as in the footer of the document. You can use the Document Property called “Title” and place it into both locations. When a user enters the title on the cover page, the footer automatically gets updated (fig. 4).
Using Document Properties improves the user experience and helps prevent avoidable typos such as when a footer doesn’t get updated. There’s nothing worse than sending a client a document that has a fake name in the footer, or worse, another client’s name!

Define a custom Table Style to match your branding
Something often overlooked by companies is table styling. Employees will often need to create a table in their word document. I have seen employees opening Excel and creating a table to apply styling before copy-and-pasting the entire table into word.
This is a waste of time. You can define a custom table style for the document template within Word and employees can then apply the style to any created table.
Also, it’s worth noting that if you set your company colours in the Design tab as mentioned earlier, Word will use those branded colours to create multiple pre-made table styles.
At Mobile Mentor, we wanted to go further and have a striped table with a Mobile Mentor blue header. This requires a bit of setup.
1. Create a Table in your Template Document
Go to the Insert Tab and insert a table. Any size is fine, though I do recommend you choose at least 4 rows to get a feel for any colour striping you choose. Once the table is created, select it by clicking inside one of the cells.
Once you’ve selected the table, notice that a new tab appears in the menu ribbon. The tab you want is called “Table Design.” Click on that tab to see the table styles available (fig. 5).
2. Create a Custom Table Style
Select the drop-down for the table styles to expand it. To start you may want to select one of the available styles that closely resembles the style you ultimately want. This will save you some time.
After selecting your starting style, expand the table styles again and this time look at the bottom for the “Modify Table Style” button. Click that to open the styling dialog window (fig 6).


The trick to using this window properly is to make use of the “Apply formatting to” drop-down list which allows you to choose which row or column of the table you want to apply your formatting to. You can then modify the borders, fills, text colour, font, etc. on a per-column or per-row basis. It also has options to format alternating rows and columns. Play around to see what you can achieve.
Once you are happy with the styling be sure to name the style and click OK. This table style will then be available to other users as a custom style in the template.