“The world is moving to remote management for devices and this creates some challenges with deploying quality-of-life features for employees. We recently were able to deploy some office templates (Word, Excel, PowerPoint) to our employees through Microsoft Intune.”
For our employees, the experience is when they open any office application, they can choose a new file and are presented with a list of company-approved templates to choose from.
This raises quality and saves time for our employees. They can focus on the content and the formatting, color schemes, and other brand aspects come automatically for the ride.
Here are the benefits we’ve observed…
Templates are deployed to a user’s device when they enroll
From this point forward, all employees start with the full set of company templates at their fingertips from the moment they join. This makes training a cinch and standardizes the training process. Everyone in our company can find the templates using the exact same steps – cross training is a breeze.
Templates are synced via SharePoint sync and are available offline
Under the hood, we deploy the templates through OneDrive using SharePoint Sync, which makes the files available offline. So, if someone is on the go and doesn’t have an internet connection, they can still use the templates.
To our employees this is all invisible of course – they just know that the templates are available in their office applications. With this solution, there’s no action to take for employees. The files show up as a template under New in their office applications and they can use them any time, offline or online.
Templates are centrally managed and any changes/updates to the templates are immediate if the device is online
This was a perennial problem for us and many companies. Stale company templates get left in the wild and inevitably someone uses an outdated one for a critical client-facing artifact.
With this solution we can centrally managed versioning so that everyone gets the most recent version.
As a note, this isn’t a silver bullet. Once a file is created, that file retains the version of the template it was created in. So, there is some training involved to teach people to use the new templates, rather than constantly clone an existing document perpetually.
Deploying Office Templates using Microsoft Intune
At a high level, these are the steps involved
-
Upload the templates to a SharePoint site and configure access
-
Create and assign the script to sync the SharePoint site on the end user’s device
-
Create and assign the configuration policy which points the office applications to the synced SharePoint site
Prerequisites
-
The OneDrive application has already been deployed to the user devices
-
The user devices are enrolled in Microsoft Intune
The remainder of this article comprises the steps we took to deploy this solution to our users. It is technical in nature and will require some engineering background to duplicate.
Upload the templates to a SharePoint site and configure access
First, we need to identify a SharePoint site that is accessible by all users that need to access the templates. This could be a company-wide site or a specific department site if we wanted to manage templates by department.
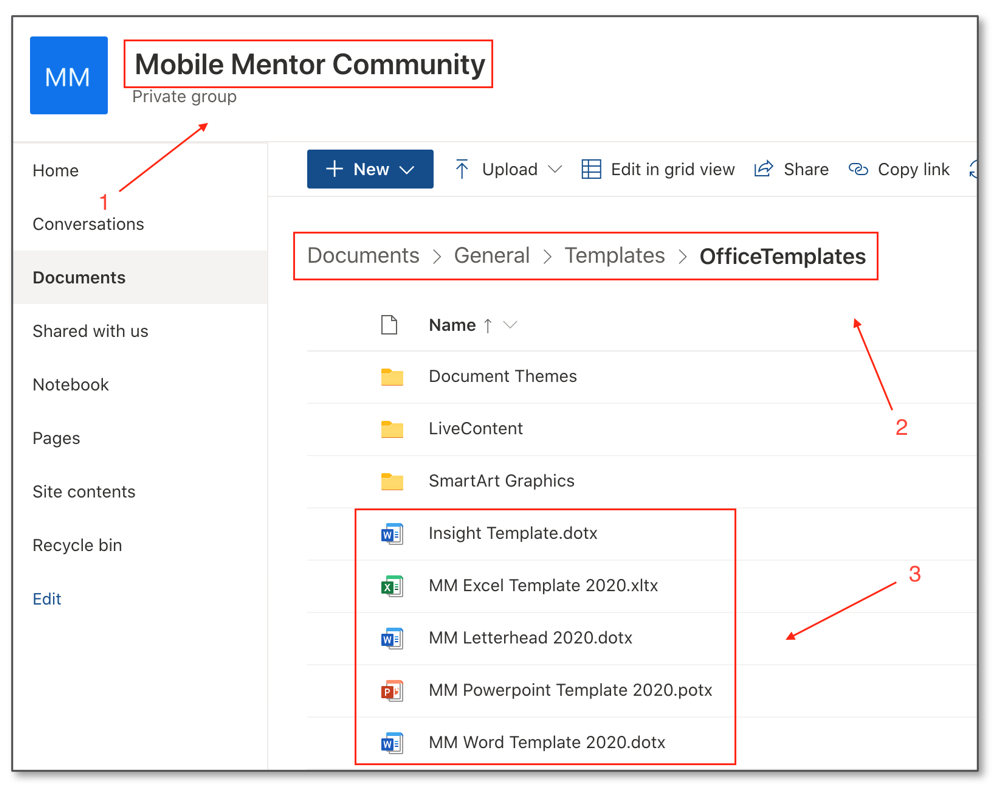
We’re going to use a company-wide site. The screenshot below shows the SharePoint site where the templates were uploaded (1), the path (2), and the templates (3).
Set Permissions in SharePoint
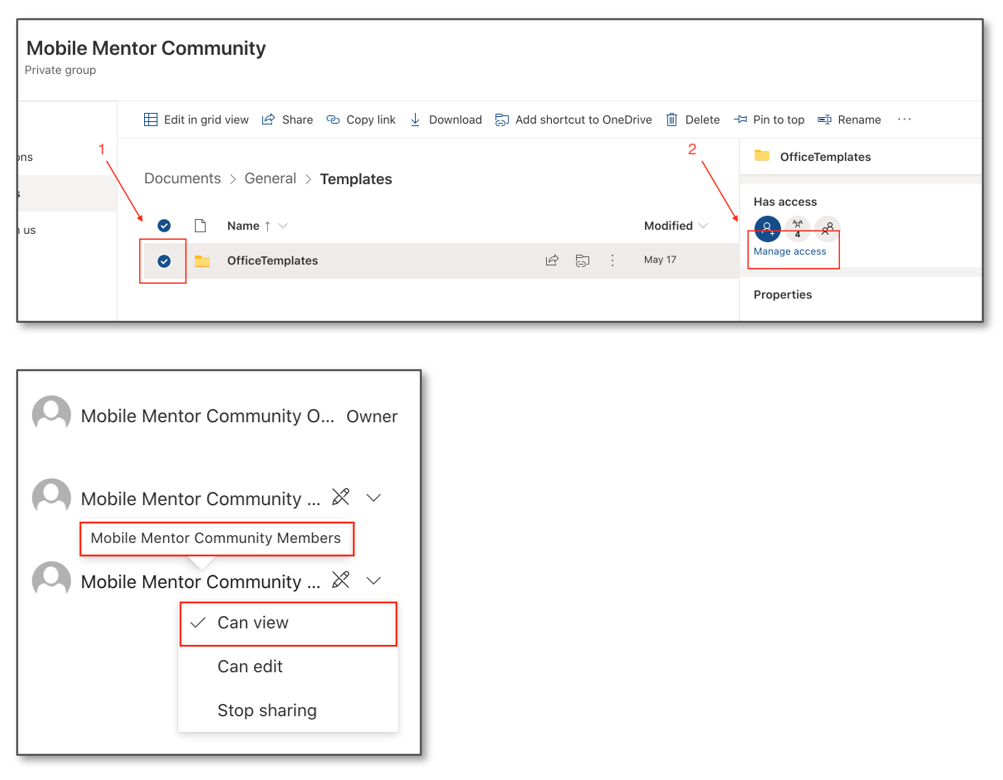
Now that we have our template location, we want to protect the files from accidental modification. To do this we need to make the templates folder read only for members.
The screenshots below show how to accomplish this.
Select the folder where the templates are (1), click manage access (2), find the [Your Site Name] Members permission, and change the setting to can view.
In our example below, the site name is Mobile Mentor Community. Yours will be different based on which SharePoint site you choose.
Create and assign the script to map the SharePoint site on the end user’s device
Now that we have our templates where we want them, we need to map the SharePoint site to the end user devices so the files can be seen by Office.
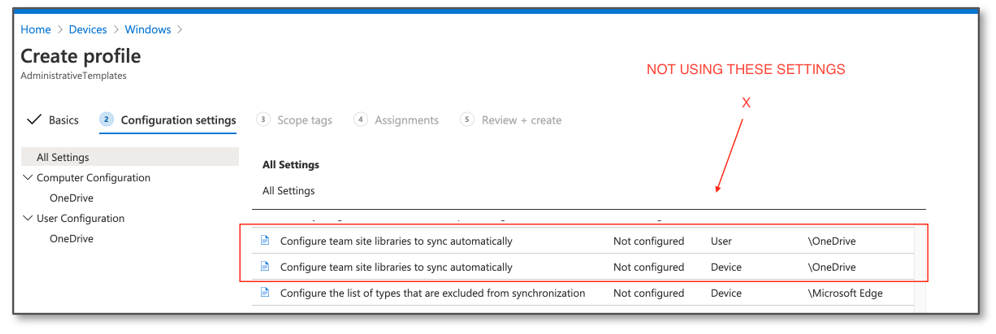
As you can see in the screenshot below, Intune does provide the ability to sync SharePoint libraries using an administrative template configuration profile, but we’ve had issues with libraries not syncing due to character limits, so we are not using these settings.
Your experience may vary.
Instead we’re going to use a PowerShell script made available on GitHub by Tabs-Not-Spaces. We’ve slightly modified the script we’re going to use, and the modified script can be downloaded by clicking here.
Now that we have our script, we need to put in our SharePoint and Azure AD information so it knows which site to sync. To do this we need to:
-
Get the SharePoint site IDs
-
Update the script with the SharePoint site IDs
Get the SharePoint IDs
We’ll be using chrome to get the IDs we require from SharePoint to populate the script.
In Chrome, we’ll open the SharePoint folder where we uploaded the template files. Once loaded, we’ll press F12 to open the developer pane, select the Network tab (1) and click the clear button to clear previous requests (2).
Next, we’ll click on the Sync button on the SharePoint ribbon (3).
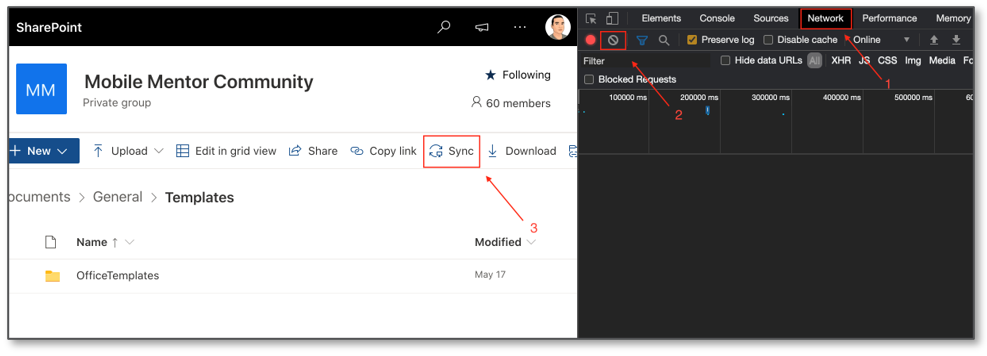
Once the sync button is pressed, a box will pop up requesting to open OneDrive (1). We’ll click Cancel. In the developer pane we can now see the sync request in red (2).

When we click on the sync request and scroll down to the bottom of the headers tab, we can see all the IDs we require to populate the PowerShell script.
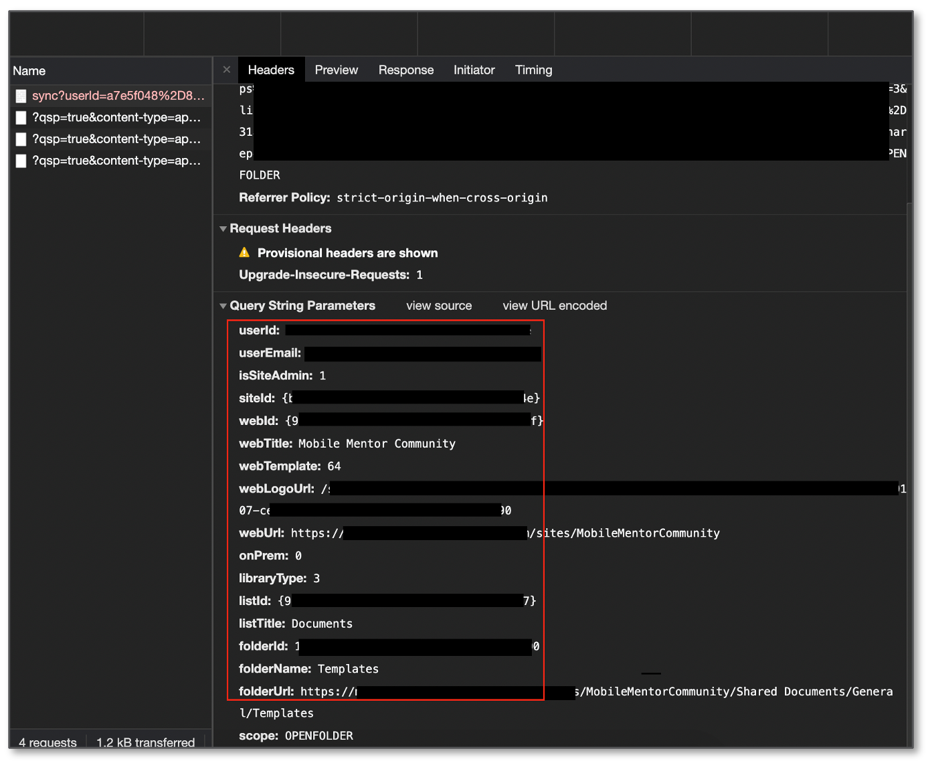
Update the script with the SharePoint site IDs
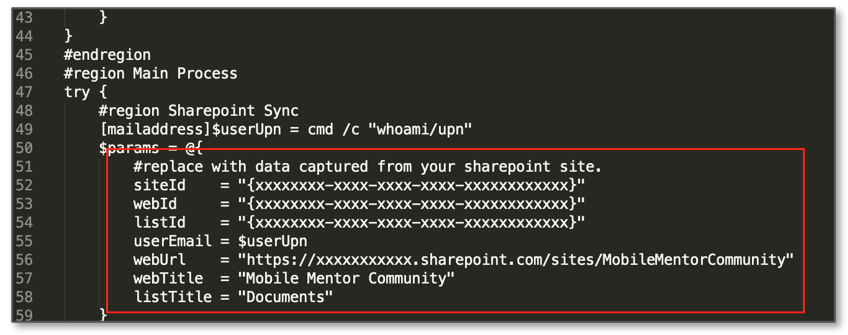
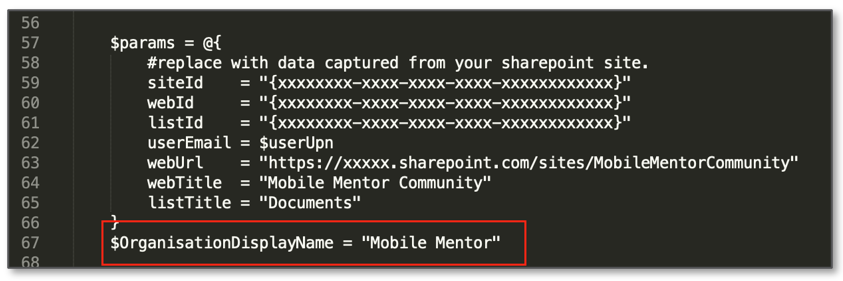
Now that we have the IDs necessary to populate the script, we’ll open the script and scroll down to the section where we need to populate the information (lines 52-58 in the screenshot below). The following IDs need to be copied from the developer pane into the PowerShell script:
-
siteId
-
webId
-
listId
-
webUrl
-
webTitle
-
listTitle
The userEmail value should be left as $userUpn.
The last parameter we need to enter is the organization name shown under Azure Active Directory in the Azure Portal. To do this we’ll browse to https://portal.azure.com and select the Azure Active Directory blade.
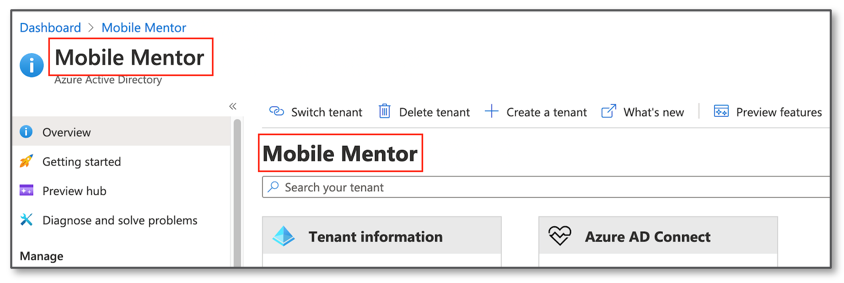
We’ll then copy the organization name shown and paste that into our script.
Deploy the PowerShell Script
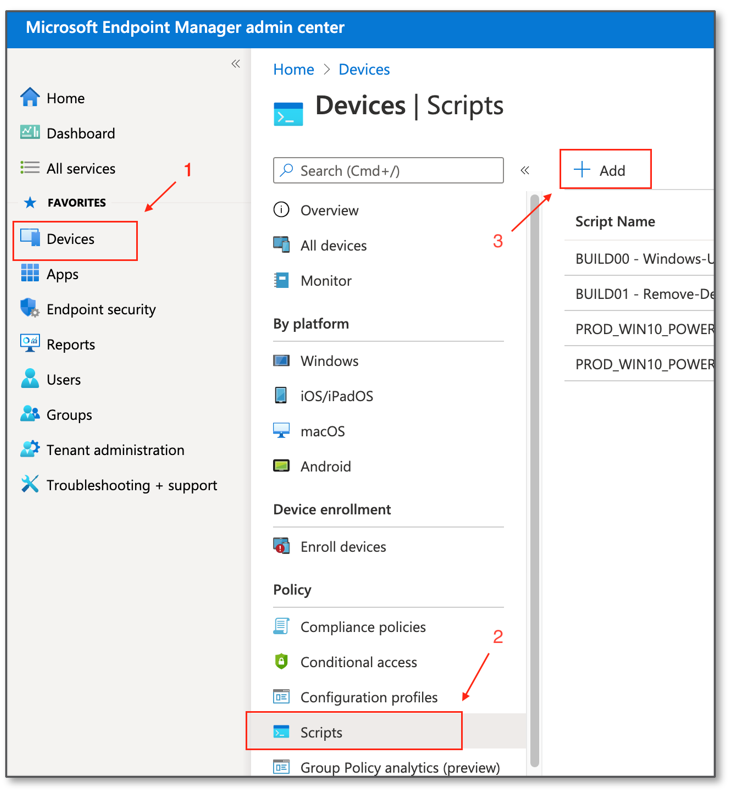
Now that we have our script, we need to deploy it using Intune. In the MEM portal we’re going to click on Devices (1), Scripts (2), click Add (3), and select Windows 10.
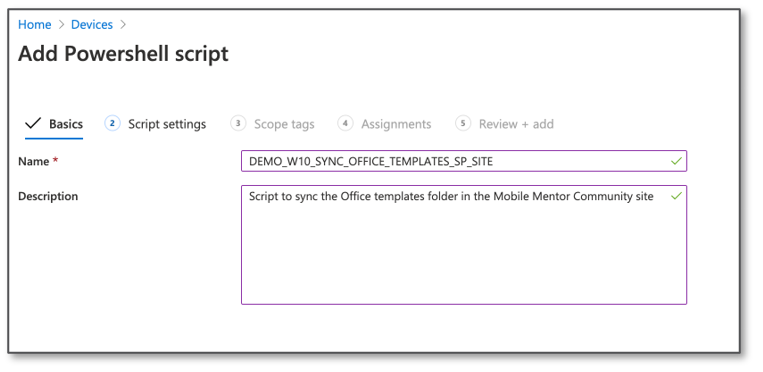
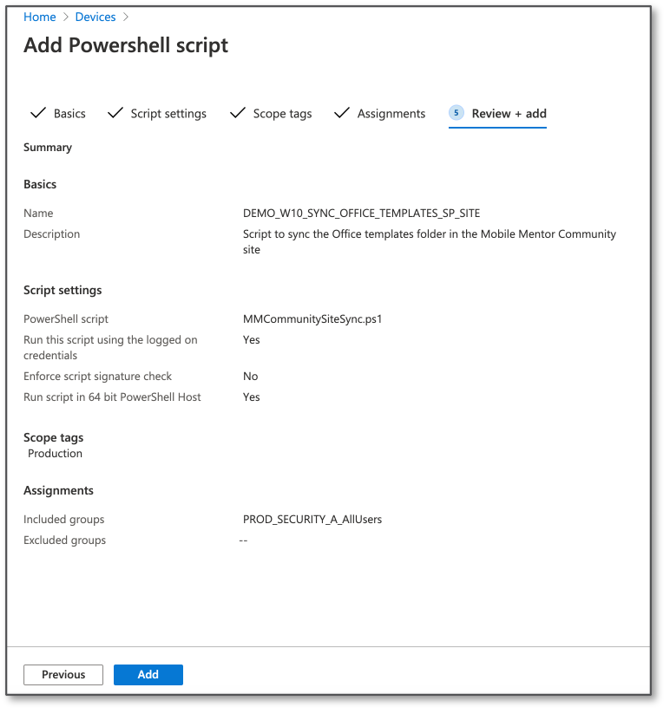
We’ll give the policy a name and description and click next
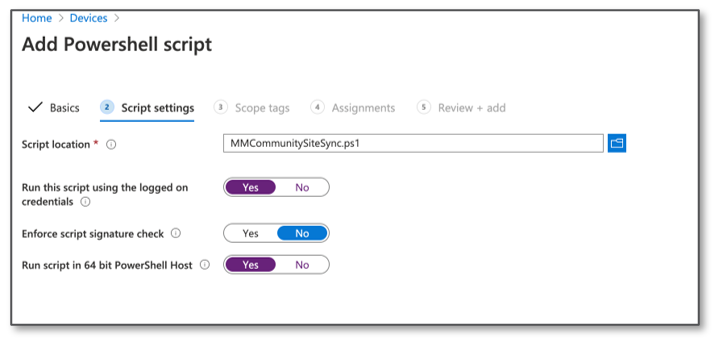
For script location we’ll click on the blue folder icon and select the script we created. Since we want the script to run as the logged on user, we’ll set Run this script using the logged on credentials to Yes.
Ideally, we would want to enforce script signature check, but as we’ve not signed the script we’ll leave Enforce script signature check as No – if you sign the script you can set yours to Yes.
As our devices are all using 64-bit Windows 10 we’ll set Run script in 64-bit PowerShell Host to Yes, then click Next.
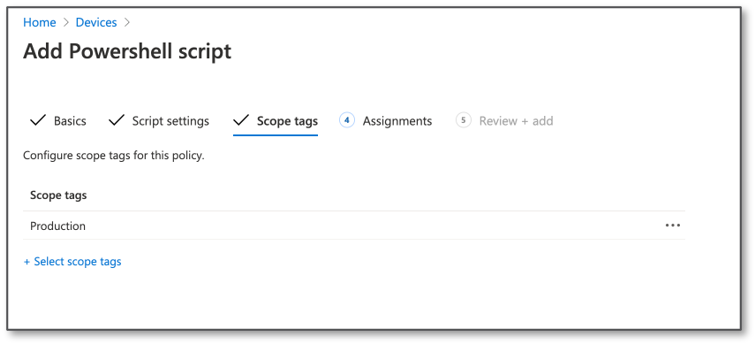
We’ll assign a scope tag to this policy and click Next.
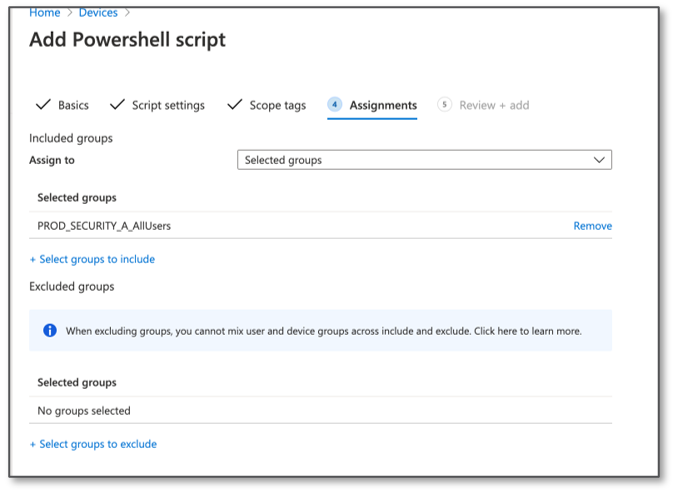
We’ll then select the group we want to assign the policy to and click Next.
Finally, we’ll review the configuration to make sure we’ve not made any mistakes, and then click Add.
Create and assign the configuration policy that points the office applications to the synced SharePoint site
Now that the script to sync the SharePoint site has been deployed, we need to get our Office applications to look for templates in that location.
We’ll do this using an administrative template configuration profile in Intune.
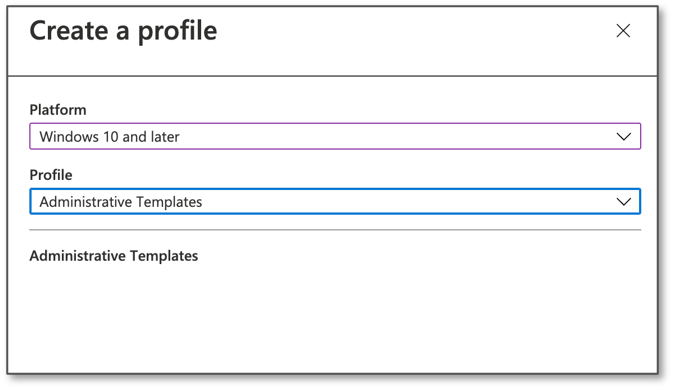
We’ll click on Devices, Configuration profiles, and select Create profile.
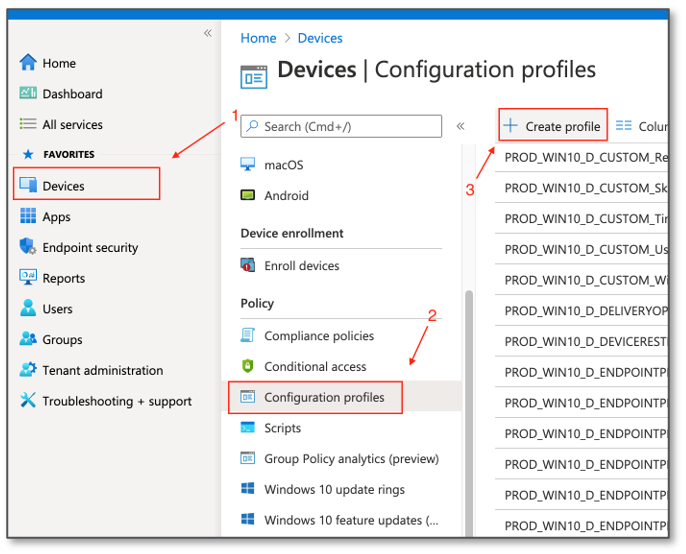
We want to set the platform to Windows 10 and later, and the profile as Administrative templates, and click Create.
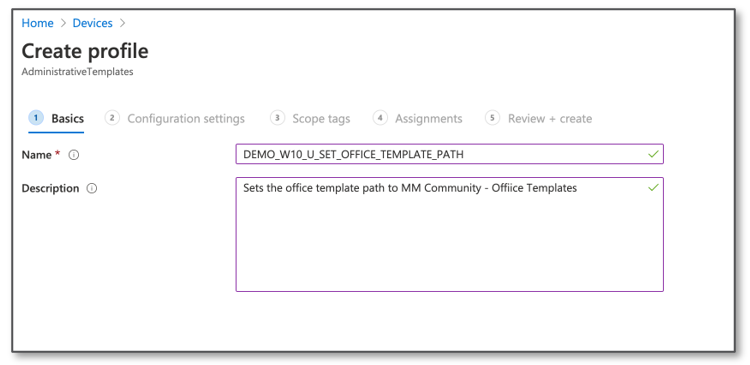
We’ll give the profile a name and description and click Next.
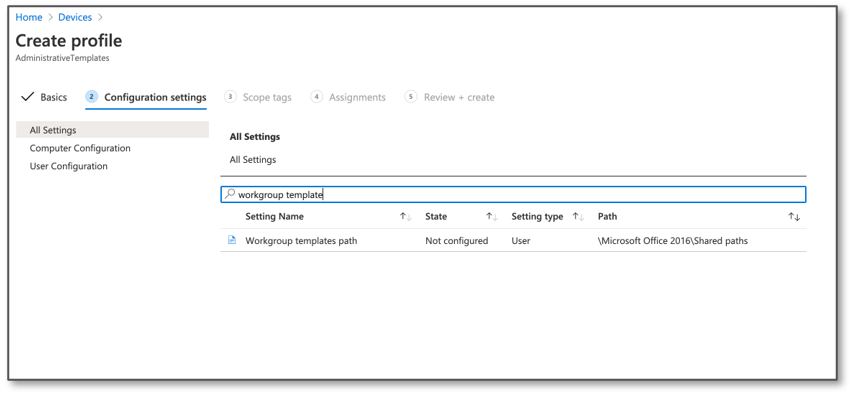
Next, we want to configure the workgroup templates path setting, so we’ll click on All Settings on the left, and search for workgroup templates.
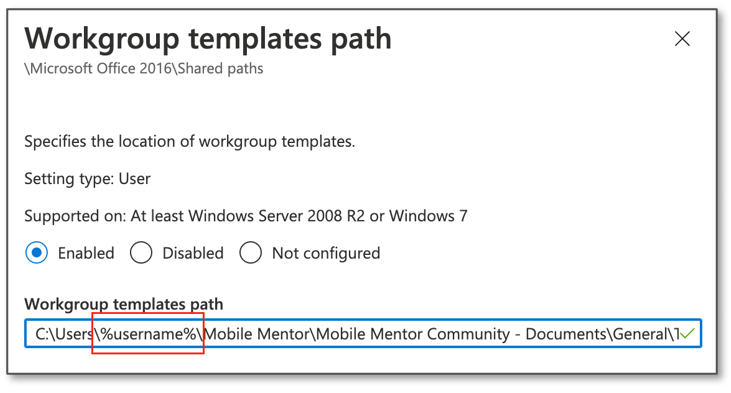
Under the workgroup templates path setting, we’ll click Enable, and we’ll paste in the path to the templates. We can find this path by opening up file explorer on a computer that has the SharePoint site synced, browsing to the template location, and copying the path from the URL bar.
As this path will be unique for each other, we need to set the username portion of the URL to a wildcard value as shown in the screenshot below. Once done, we’ll click OK, and then Next.
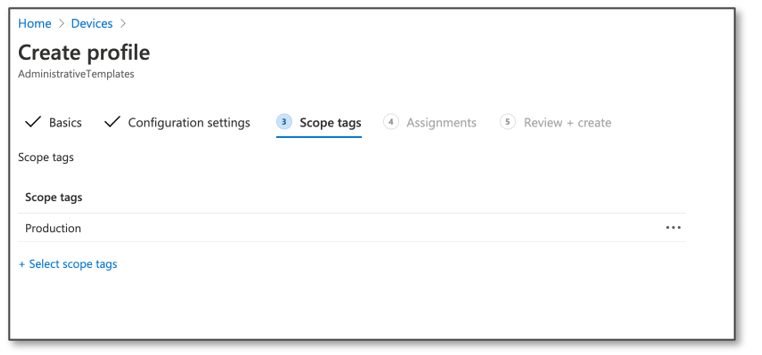
We’ll then set our scope tags and click Next.
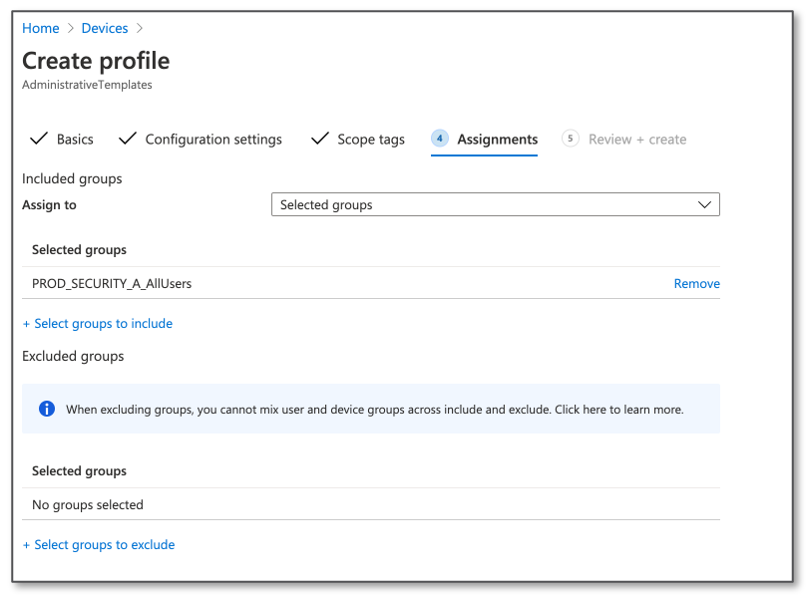
We’ll assign this profile to the same group we assigned the script to and click Next.
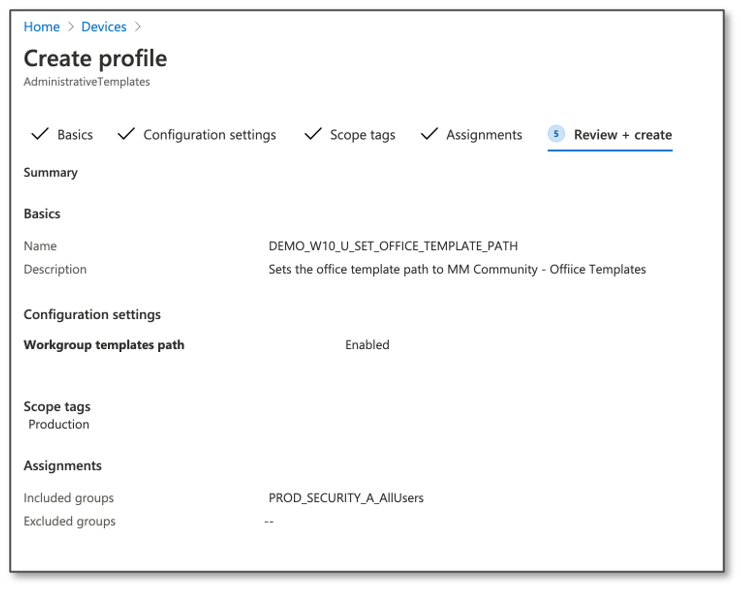
And finally, we’ll review the configuration is correct and click Create.
Validate the Solution
That’s it!
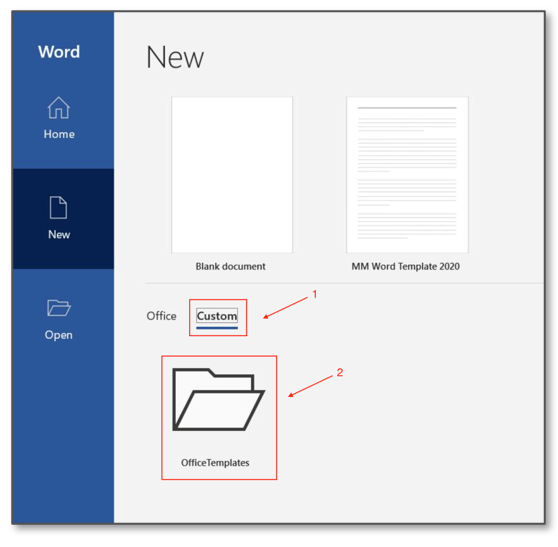
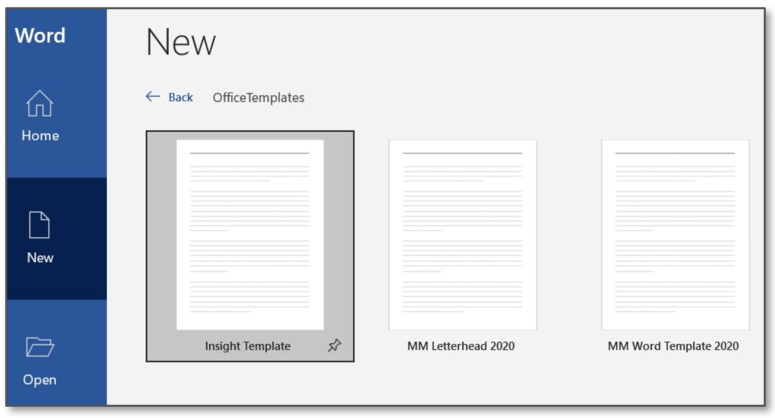
The setup is now complete. As devices start checking in the new profiles will be applied. We’ll be able to confirm the setup is working as expected by opening Word, clicking on New, selecting the Custom tab, and clicking on the Office Templates folder as shown in the screenshot below.
Obviously, you’d want to have at least one Word template present to validate against.
Conclusion
This is one of many quality-of-life solutions that is a once-and-done effort for IT. It makes your employee experience better, saves time, and improves branding.
Plus, it’s kind of cool.
If you are interested in learning about how you can use Microsoft Intune to manage your Windows 10 or other devices, check out our services or contact us.

Download the Six Pillars of Modern Endpoint Management
Deep Dive Concepts such as:
- Zero Trust
- Passwordless Authentication
- Zero Touch Provisioning
- App Management
- Over-The-Air Updates
- Remote Support
