How to configure Chrome settings with Microsoft Intune
Have you ever needed to configure your entire group’s chrome settings for security purposes or to meet company preferences? It’s not uncommon for companies to do so to keep their team aligned. Many groups may want to add or block particular extensions in Chrome for productivity reasons. For Intune admins, there is a relatively simple set of instructions to achieve your desired outcome with Chrome configurations.
If you’ve discovered these instructions, it is more than likely that you’ve discovered the downside. That being that there are no out-of-the-box configurations capabilities available for Chrome settings in Intune. However, there is a way to achieve your desired configurations by creating a customized experience with your Intune environment.
Follow the steps below and you’ll find yourself on the path to configure and manage your team’s Chrome settings with ease.
1.1 INGEST CHROME ADMX TO INTUNE
-
Download the Chrome ADMX
-
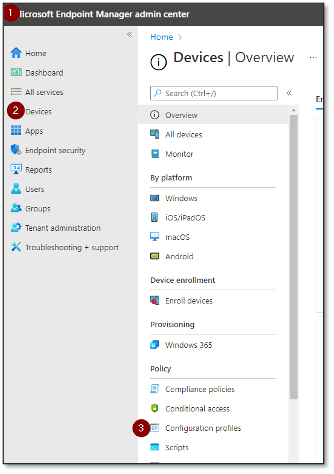
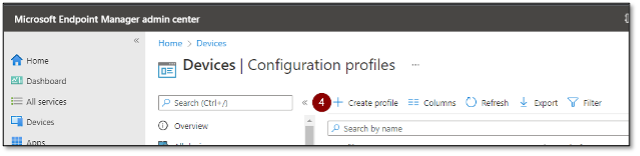
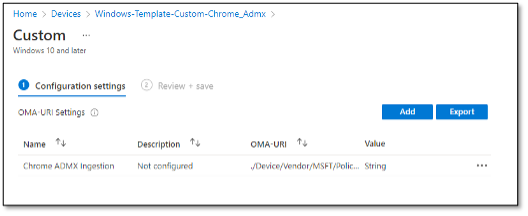
Create a Custom Windows Configuration Profile
a. Endpoint Manager > Devices > Configuration Profile > + Create Profile


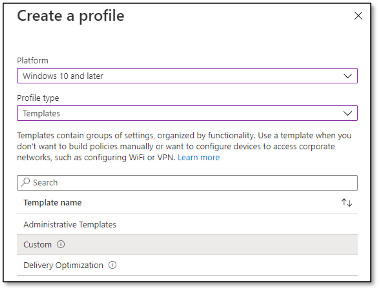
3.Select the following:
a. Platform: Windows 10 and later
b. Profile Type: Templates
c. Template name: Custom

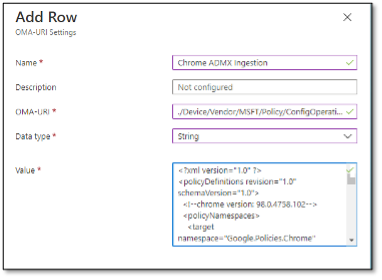
4. Configure the OMA-URI Settings
a. Name: Chrome ADMX Ingestion
b. OMA-URI: ./Device/Vendor/MSFT/Policy/ConfigOperations/ADMXInstall/Chrome/Policy/ChromeAdmx
c. Data type: String
d. Value: Copy the contents from chrome.admx, which can be found from the download of step 1

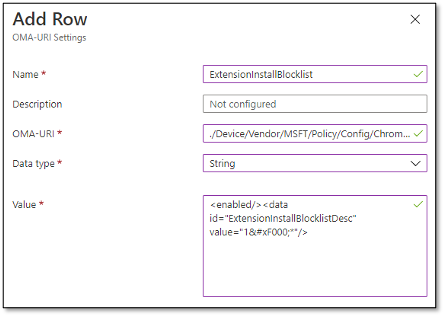
1.2 BLOCK EXTENSIONS
1. Build on top of the profile already created.
2. Add a new OMA-URI with the following settings:
a. Name: ExtensionInstallBlocklist
b. OMA-URI: ./Device/Vendor/MSFT/Policy/Config/Chrome~Policy~googlechrome~Extensions/ExtensionInstallBlocklist
c. Data Type: String
d. Value:

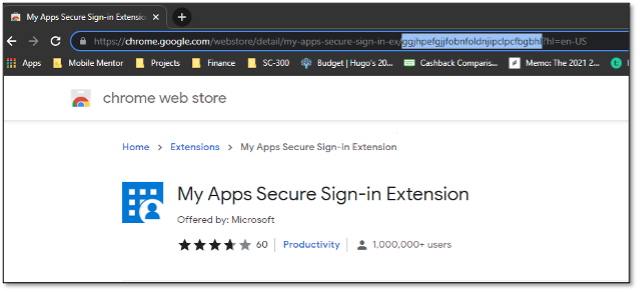
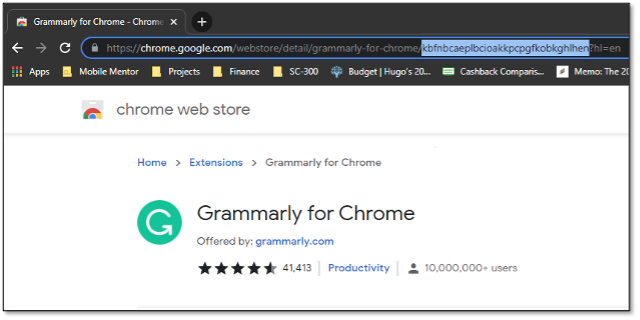
1.3 EXTENSION INSTALL ALLOW LIST
This setting bypasses the blocklist policy; allowing users to install extensions from an approved list.
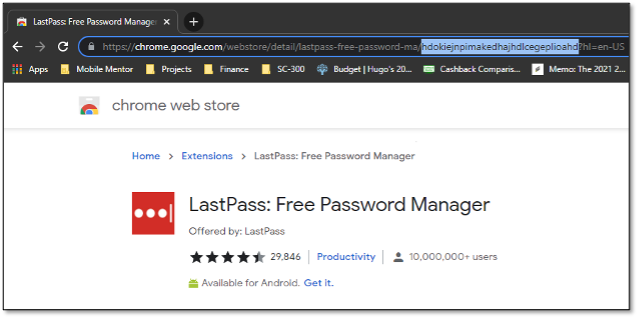
You need to specify the extension ID when managing Chrome Extensions. This ID can be found in the extension’s URL in the Chrome Webstore.


1. Build on top of the profile already created.

2. Add a new OMA-URI with the following settings:
a. Name: ExtensionInstallAllowlist
b. OMA-URI: ./Device/Vendor/MSFT/Policy/Config/Chrome~Policy~googlechrome~Extensions/ExtensionInstallAllowlist
c. Data type: String
d. Value:
“1 ggjhpefgjjfobnfoldnjipclpcfbgbhl
2 kbfnbcaeplbcioakkpcpgfkobkghlhen”/>
-
Each extension must be prepended by #
-
Each extension must be appended by unless it’s the last extension in the series.
1.4 EXTENSION INSTALL FORCE LIST
This policy bypasses the block policy and automatically installs the extension to the chrome browser.
1. Build on top of the profile already created.
2. Add a new OMA-URI with the following settings:
a. Name: ExtensionInstallForcelist
b. OMA-URI: ./Device/Vendor/MSFT/Policy/Config/Chrome~Policy~googlechrome~Extensions/ExtensionInstallBlocklist
c. Data Type: String
d. Value:
-
This policy follows the same syntax as the ExtensionInstallAllowlist policy
-
Each extension must be appended by ;https://clients2.google.com/service/update2/crx
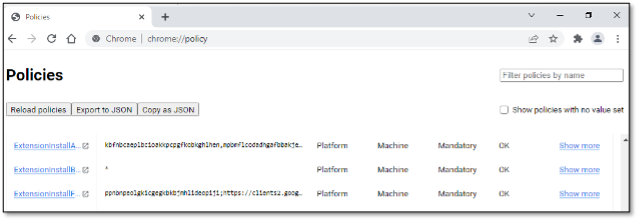
1.5 VERIFY THE POLICY APPLIED CORRECTLY
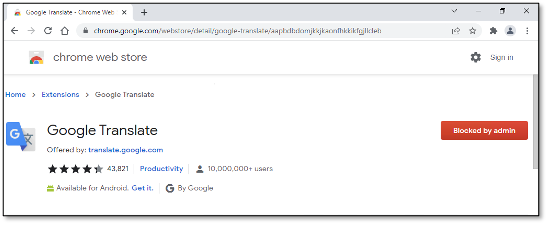
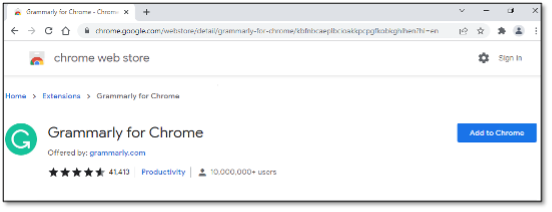
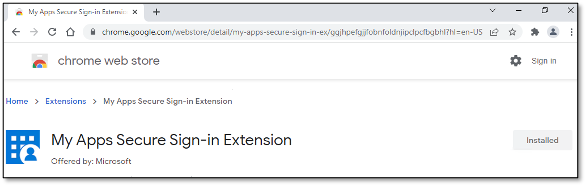
1. Find Chrome extensions in the Chrome Store
a. Blocked Extensions will look like this

b. Extensions added to the allow list will look like this
-

c. Extensions automatically installed will look like this

2. Extensions automatically installed will look like this

-