
If you are wanting to enable your Windows 10 devices for Autopilot you need the ‘hardware hash’ of your devices to be entered into the Azure autopilot portal.
If you are procuring devices from a reseller that supports this process, they will be able to load your device hardware hashes into Autopilot for you at the time of procurement.
Your reseller may also be able to let you know your devices hardware hash details when you purchase devices so you can load them into Autopilot yourself.
If you have an existing device that you are using for testing or want to enable with Autopilot manually, you will need to get the hardware hash from the device itself and manually register it in Autopilot if you are wanting to test the Autopilot process.
This article provides the steps to follow to obtain your device hardware hash manually.
Collecting a hardware number from your Windows 10 device
These steps should be run on the Windows 10 device you want to get the hardware hash from. The device will need to be powered on and logged into to follow these steps.
-
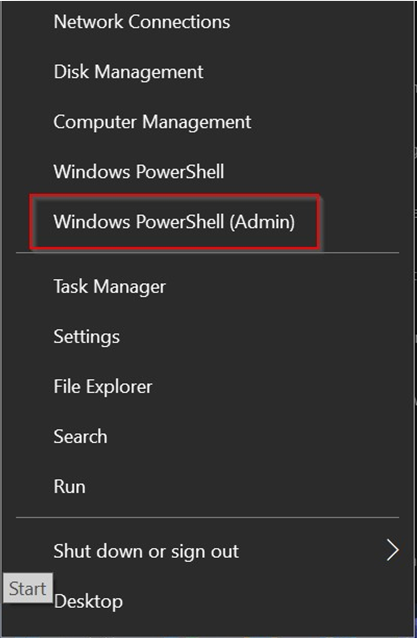
Right click on the Start icon in the bottom left corner > Select Windows PowerShell (Admin)
Admin privileges are required
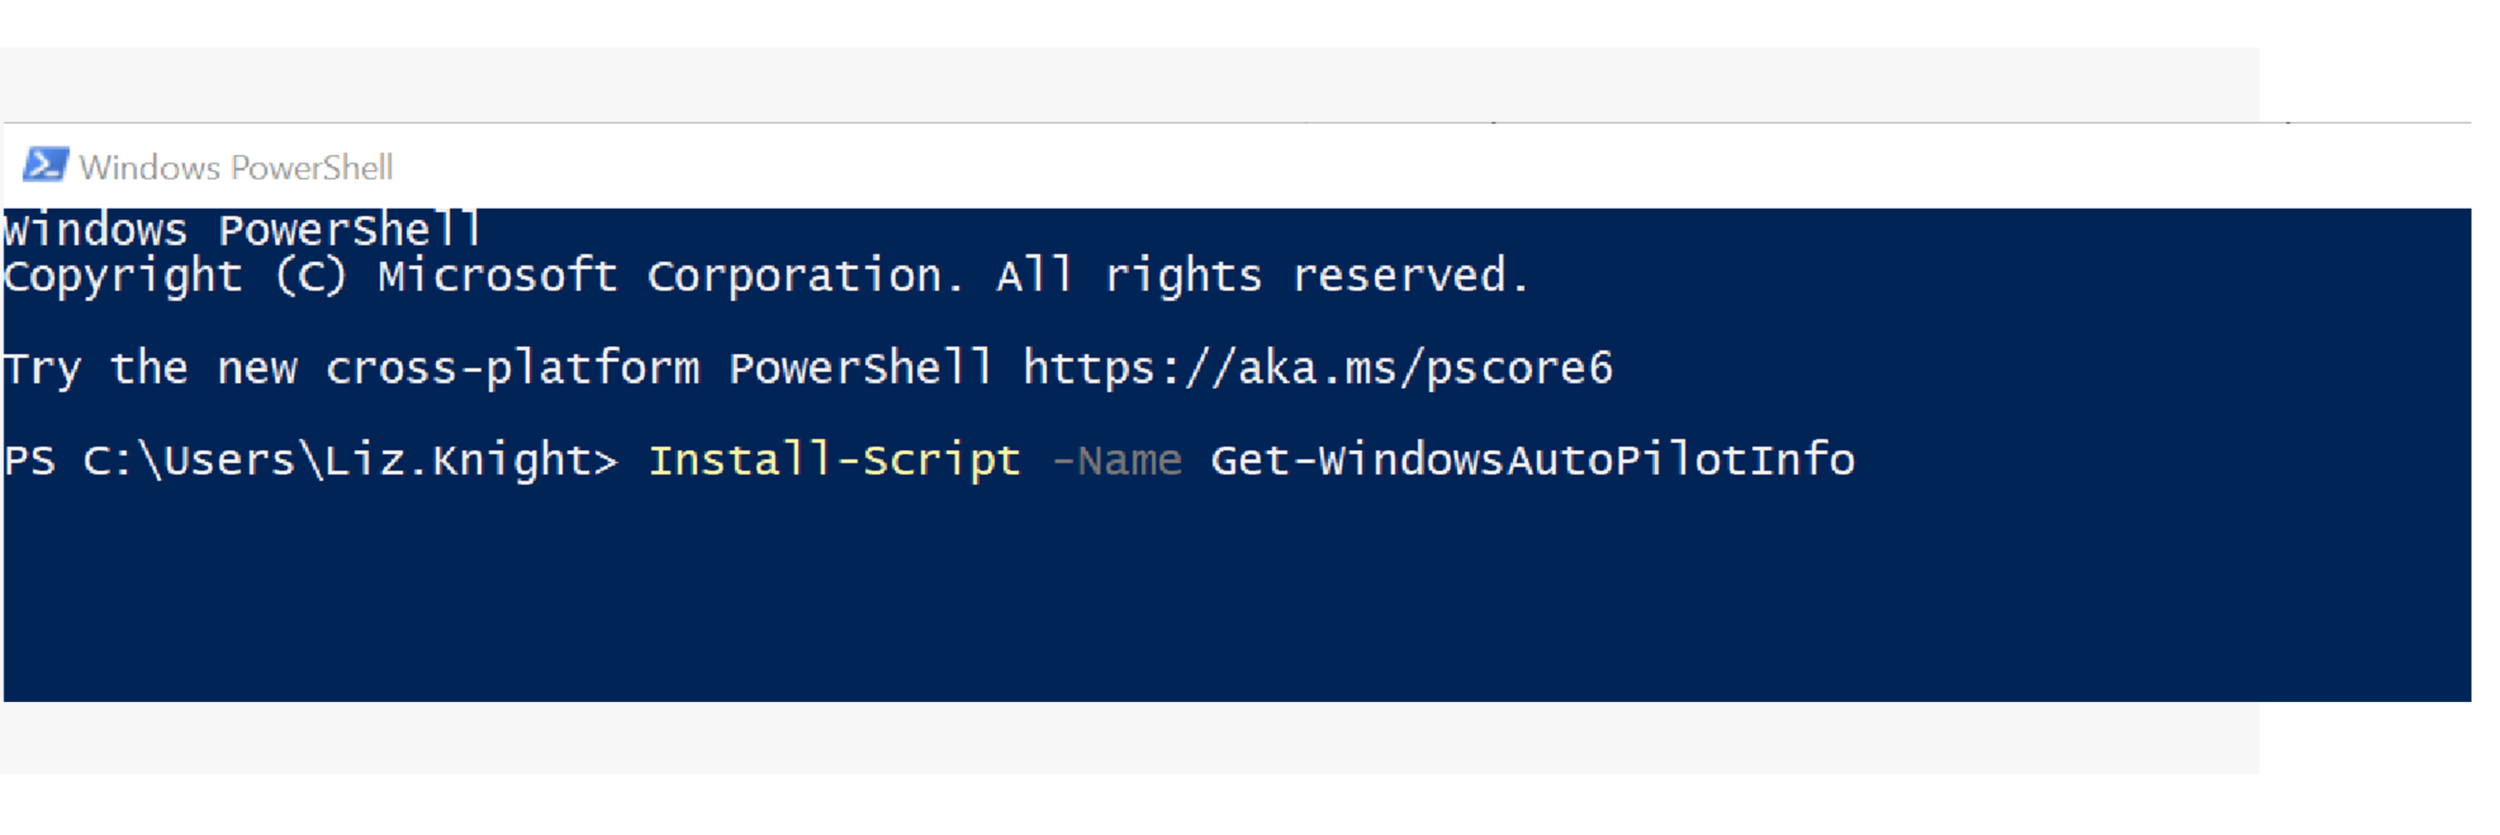
2. This will launch a Windows PowerShell window. From this Window type in the following command and press Enter:
Install-Script -Name Get-WindowsAutoPilotInfo
You may view the Nuget package details here:
Get-WindowsAutoPilotInfo
3. If Prompted for Path Environment Variable change, Select “Y.”

4. If this is a new machine where Nuget has not yet been installed, you will be prompted to import and install the Nuget module which is required to obtain this script. Select “Y.”

5. If prompted with PSGallery being detected as untrusted, select “A” for Yes to all.

6. Type in the line below and select Enter:
Set-ExecutionPolicy RemoteSigned

and select “A” for Yes to All.
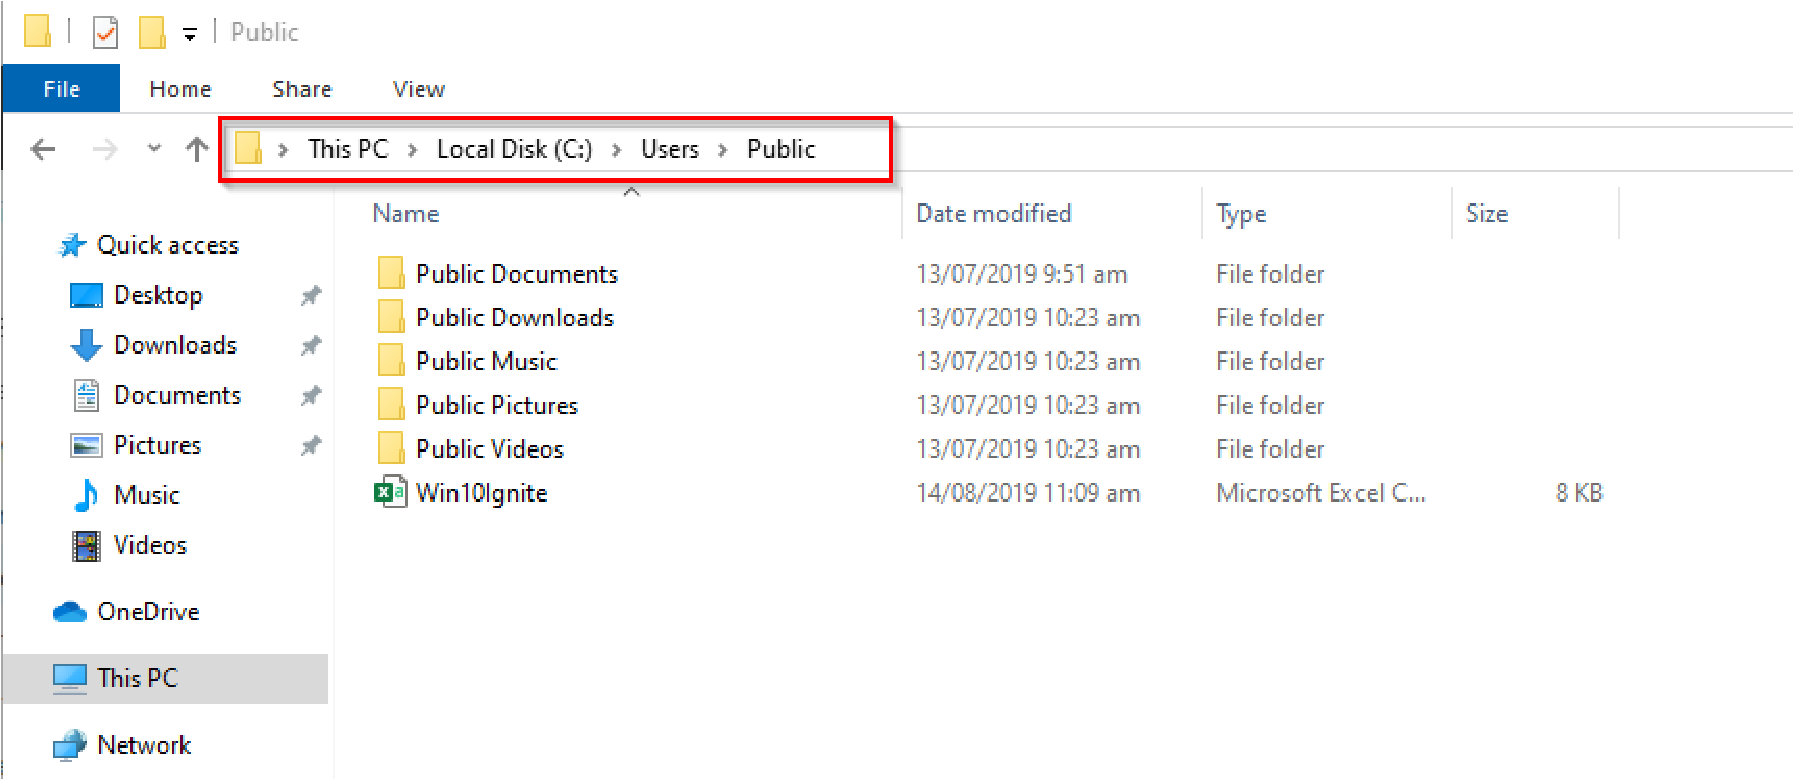
7. Type in the line below to extract the hardware hash and select Enter:
Get-WindowsAutoPilotInfo -Outputfile C:\Users\Public\Win10Ignite.csv

This will generate a file. Close PowerShell and Find the file on the computer.
8. Load this hardware hash into Autopilot. Detailed on how to load the hardware hash manually can be viewed via this link.
Resetting your Windows 10 device
To be able to enroll this Windows 10 device via Autopilot you will need to reset the device once the hardware hash has been loaded into Azure.
-
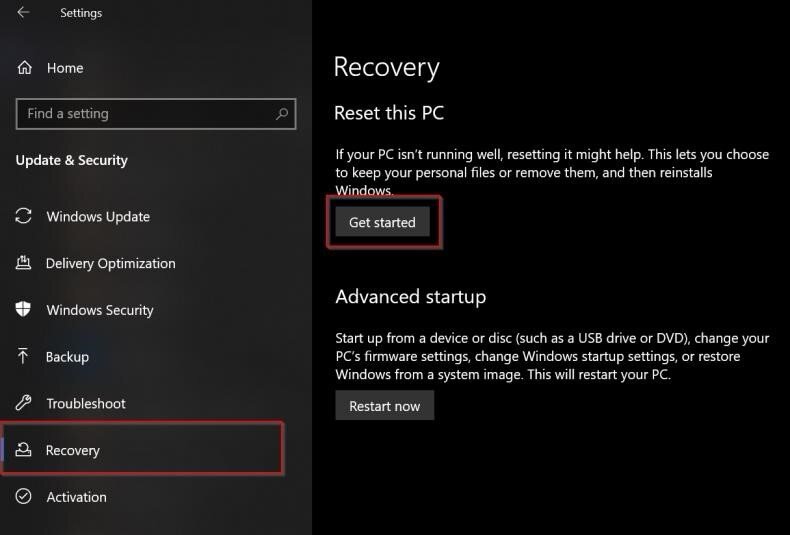
Open the Settings app.

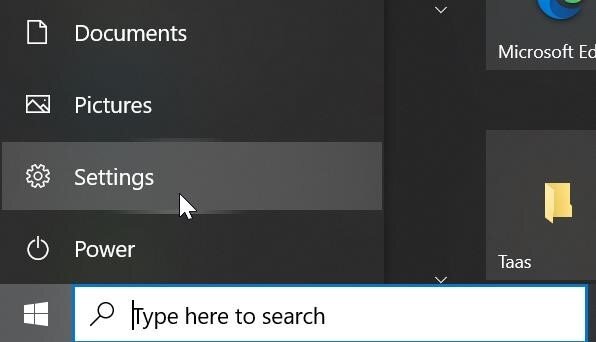
2. Go to Update & Security > Recovery > Reset this PC > Get Started.
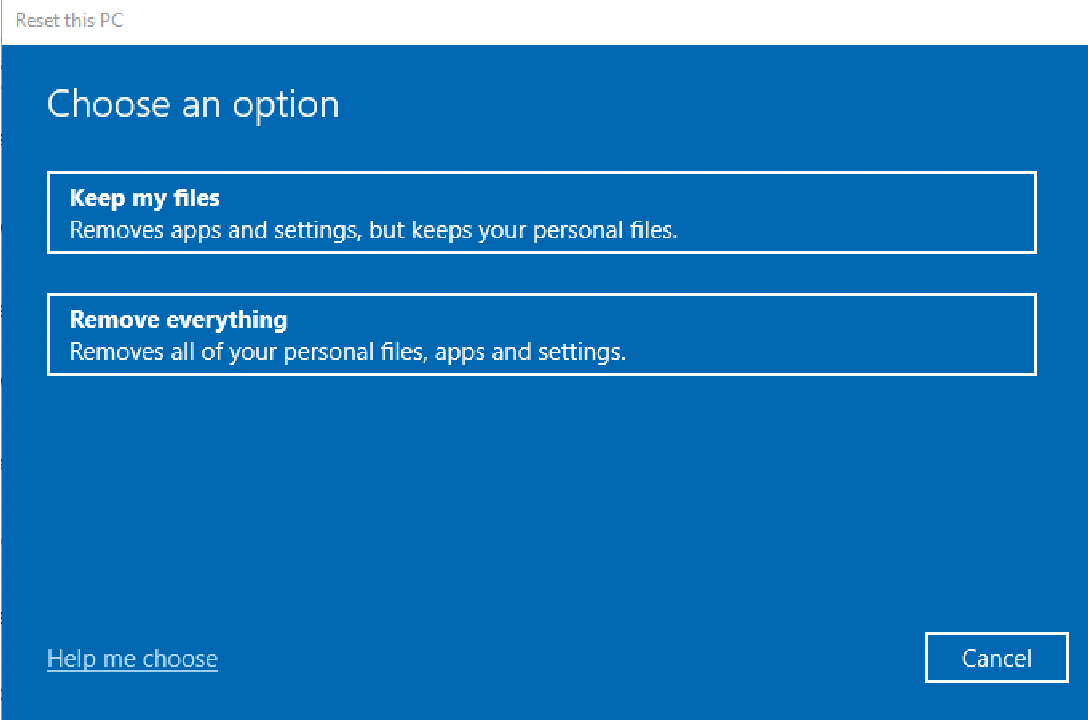
3. Select Remove everything.
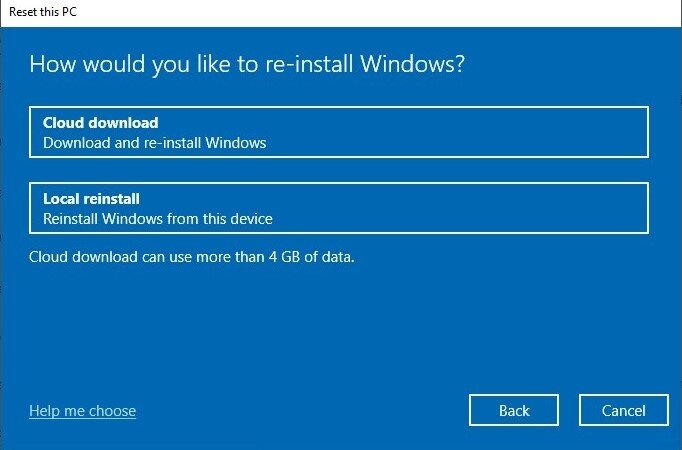
4. Select either Cloud download or Local reinstall based on your environment and the device.
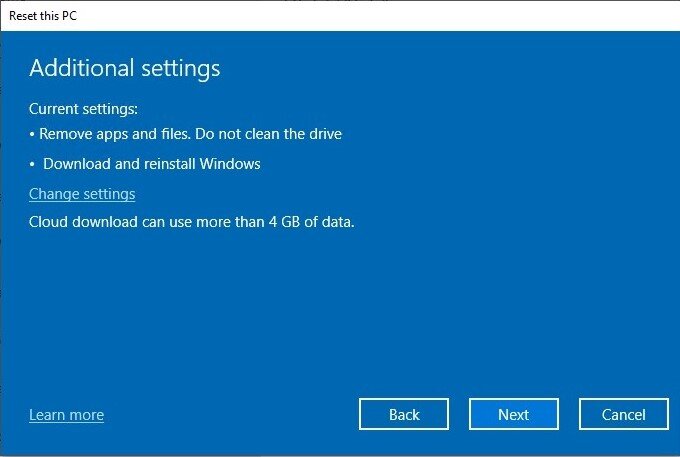
5. Select Next
Enrolling the Windows 10 Device into Windows Autopilot
You are now ready to enroll your device into Intune using Windows Autopilot.
We recommend you use this process only for test devices and testing. You probably don’t want to ask your end users to run PowerShell scripts and reset their device. New devices should be added at time of procurement so will not need to undergo this process.
There are other options you can use if you can’t get device hardware hashes easily – these are detailed in this article.
Conclusion
Mobile Mentor are device management experts, and we are specialists in Microsoft Intune and related technologies to enable remote management of your entire fleet of end-user devices.
If you’re looking at Windows Autopilot or just Intune in general, check out our Zero Touch Provisioning service and our Intune for Windows service. Or contact us.
 Connor Bevan
 Connor Bevan
Connor is a Modern Work & Security Engineer at based in Wellington, New Zealand. Working at Mobile Mentor for over three years he has a strong focus in Enterprise Mobility Management products as well as Microsoft 365 Enterprise Administration and Security Services.
Download the Six Pillars of Modern Endpoint Management
Deep Dive Concepts such as:
- Zero Trust
- Passwordless Authentication
- Zero Touch Provisioning
- App Management
- Over-The-Air Updates
- Remote Support