
In many circumstances, corporate security policy or compliance protocols will dictate that end users are not allowed to install software, including items like browser extensions. However, teams often need to leverage specific extensions for productivity. It recently happened to me that a security policy was preventing end-users from accessing the Bing AI Search bar in Edge. The solution was to whitelist/install the blocked browser extensions.
In Intune, admins have the ability to control the installation and usage of browser extensions in Microsoft Edge or Chrome. And it is really quite simple. You may already be familiar with the legacy process of whitelisting extensions in Intune for browsers such as Chrome, as outlined in here. But, Below we’ll explore an updated methodology to whitelist and silently install browser extensions, specifically for Microsoft Edge.
Step 1: Accessing Configuration Profiles
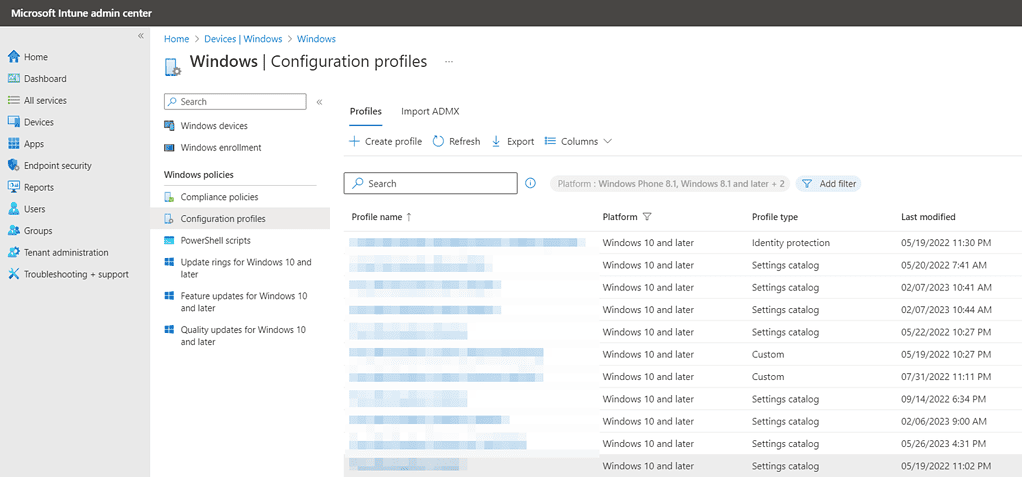
To begin the process, you need to access the Configuration Profiles section in Intune. This is where you can create or modify policies for specific applications. In order to begin the extension whitelisting process, you’ll need to access the “Devices Windows configuration Profiles” to access the specific policies that control extensions.
Step 2: Create Browser Policy
To create a new policy targeting Microsoft Edge, locate the policy that is relevant to the application you want to configure in the Configuration Profiles Section. Once you find the policy, click on it to review its settings.
Step 3: Enabling Extension Control
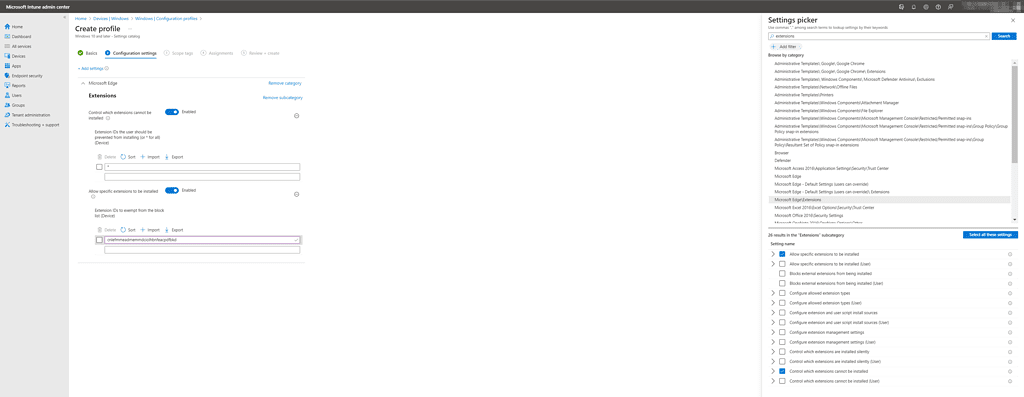
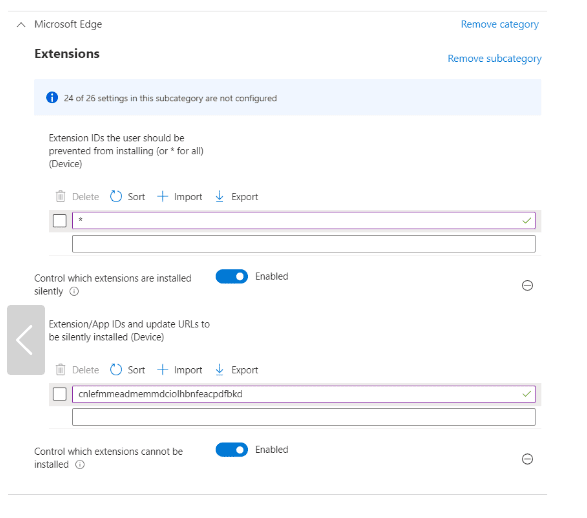
Within the Microsoft Edge policy settings, search for the extension-related policies. Here, there should be a policy labeled “Control which extensions cannot be installed.” This policy can be used to block specific extensions or all extensions can be blocked by using the asterisk character.
Step 4: Allowing Specific Extensions
To whitelist specific extensions, you need to enable the setting that allows certain extensions to be installed. Navigate to the policy labeled “Allow specific extensions to be installed.” By enabling this policy, you can add exceptions to the extension-blocking behavior.
Step 5: Adding Extensions to the Whitelist
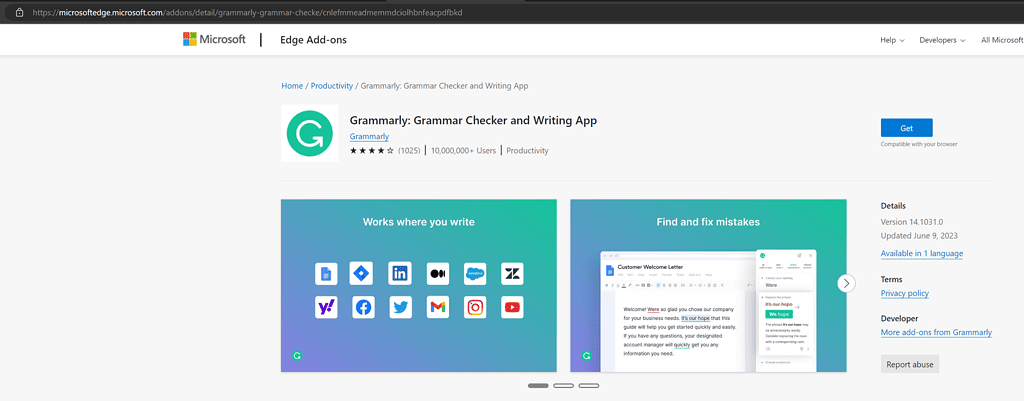
To add an extension to the whitelist, you need to specify its extension ID. In the image below, we’re enabling the Grammarly extension. You can obtain the extension ID from the extension’s URL in the app store. You can find extension IDs in the Edge store: https://microsoftedge.microsoft.com/addons/Microsoft-Edge-Extensions-Home. For
Once you have the ID, paste it into the policy settings and save the changes.
Step 6: Silently Install Extensions
If you want to ensure that certain extensions are installed on all devices, you can force the installation instead of relying on user-initiated installations. This can be useful for critical or mandatory extensions.
To silently install an extension, go back to “extensions” in your settings picker. Select the browser you’d like to force an extension to (in this case we’ve selected Microsoft Edge). Then select “Control which extensions are installed silently”.
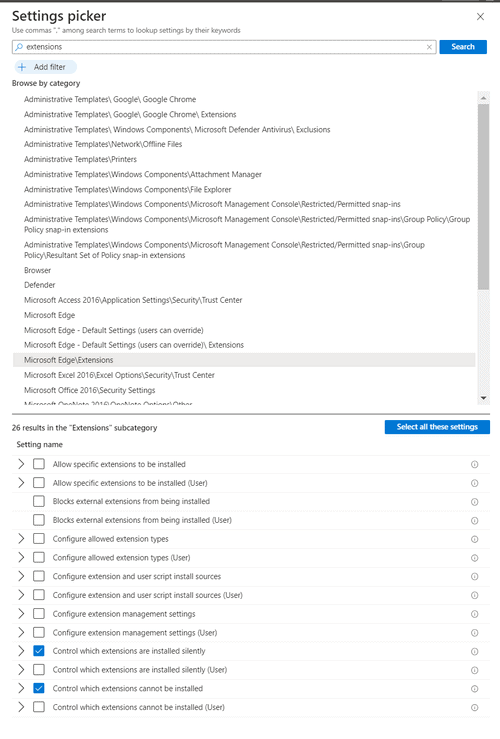
Follow the same process for whitelisting. Enable the extension to be controlled silently. Then, enter the extension ID of the extension you want to force to end-users.
Conclusion:
Whitelisting extensions and controlling their installation is an important aspect of managing applications in Intune. By following the steps outlined, you can effectively manage and secure extensions in Microsoft Edge. Whether you need to block certain extensions or ensure the installation of specific ones, Intune provides the necessary tools and policies to meet your business’ requirements.
CONTACT US TO LEARN MORE ABOUT INTUNE

Craig Orth
Craig Orth is Modern Work & Security Engineer on Mobile Mentor’s Managed Services team. He has spent the last 6 years managing IT projects and engineering solutions for United States-based customers with locations around the globe. Craig hails from Chicago and currently resides in San Antonio, Texas.


